Thursday, February 5, 2009


I found these beautiful cocktail napkins at a local flea market. The color combination reminded me of the Valentine candy hearts I used to get from schoolmates.

I selected 4 phrases:
1. Be Mine ( me le mein )
2. Charm Me ( me charmer )
3. Kiss Me ( m'embrasser )
and
4. My Love ( mon amour )

I translated the phrases into French and got busy embroidering. They turned out just as I imagined~
You can see my Embroidered Valentine Napkin Tutorial here.

Sunday, February 1, 2009

Sunday list about me:

1. I like dragging out ALL of my art supplies and then organize them back into neat little piles and containers.

2. I eat raw brownie batter when no one is looking

3. I purposefully killed my child's goldfish (and still feel guilty)

4. I shaved my head once to prove to myself that beauty is on the inside

5. I married my high school sweetheart

6. I want to learn French

7. I talk to myself in the car

8. I have a goal to read all of the Newberry Honor Award books

9. I could stay home for weeks without leaving

10. I experience hallucinogenic sleep paralysis (hypnagogia)

11. Middle Eastern food is my favorite

12. My best friend lives 1873.29 miles away

13. I snuggle with my children when they are asleep

14. I don't have any tattoos, although I am desperate for some sparrows on my forearm

15. I've had my hair cut by Lorraine Massey

16. I traveled Europe for a month at age 12

17. I'm a black coffee drinking machine

18. I've owned my own business for 8 years

19. I completed high school early

20. I still wear my hot pink butterfly retainer

21. Ecclesiastes 3:1-15 - I keep these words close to my heart

22. Getting lost in a book is the best

23. I want my family to live abroad for at least one year

24. The sea calls to me from afar...I am part mermaid you know

25. There is nothing more delightful than opening the mail box and discovering a hand written letter or small parcel addressed to oneself

Tuesday, January 27, 2009


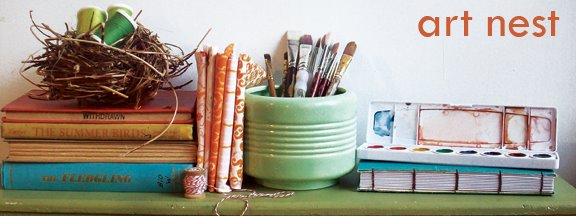
Hand bound books I completed this past weekend. One is a journal and one is a watercolor sketch book.

Friday, January 23, 2009

Books, Books, Books....


Today's project: Finish binding this journal.
The front is hand painted 'prive' (French for 'private'). I am in love with the color of this journal. Mix it with the waxed linen thread in chocolate brown and I can't stop looking at it.
I love how constructing these books allows be to use my hands, paintbrushes, paper, needle and thread and sometimes even fabric. I can really mesh lots of my interests into one project!

...................................................................................

I'd like to share some of my favorite children's books with you. Each of these series holds a special place in my heart and it has been delightful to reread these as an adult and mother. These books are timeless. Wisdom, humor, and truth are woven into these stories. I recommend purchasing these books for your child's library. Your family will cherish them forever.


Flicka, Ricka, and Dicka series by Maj Lindman
If you did not have the privilege of reading these books as a child, you simply have to read them now...to yourself and your children. My mother read these books as a child...so special. The original hardcover books are collector's items and cost a pretty penny. However, this delightful series has been released in paperback and you can find them at most online bookstores. There is also a series about 3 brothers called Snip, Snap, and Snur so your son can also join in on these adventures.


Frances series by Russell Hoban. Illustrated by Lillian Hoban
Have you met Frances? She is the cutest little girl badger you will ever read about. Her stories are well written and classic. Frances lives with her parents and little sister. She is often getting herself into little situations and has to figure out how to deal with her decisions. I love Bread and Jam for Frances and must warn you about Bedtime for Frances - You will be fighting off invisible tigers and laundry giants if you read this right before your kids settle down (but you still should read it!)


Ramona series by Beverly Cleary
You probably read Ramona in grade school or some of Beverly Cleary's other works. We are reading this very book (Beezus and Ramona) at night to our children and I am just captivated by the way Beverly Cleary writes. She uses detailed descriptions and everyday situations to paint a lively and humorous world. It is a totally different experience reading these as an adult now - all moms will smile with understanding while reading these aloud~ Also look for the Henry Huggen's series for boys. He makes appearances in the Ramona books.

....................................................................................

Sunday, January 4, 2009

Embroidered Valentine Napkin Tutorial


Supplies:
A. Four cocktail napkins in assorted colors
B. Scissors
C. Embroidery needle
D. Disappearing fabric pen
E. 1 skein of embroidery floss in cream
F. small embroidery hoop (not pictured)

Step 1:

Using your fabric pen, transfer your phrases onto the napkins. I wrote my phrases in pretty script with a Sharpie on white paper. I lightly taped my written phrases onto the back of the napkin and then held them both up to a window. A light table works well to. Or, if you would rather use transfer paper, follow the transfer instructions from the manufacturer.

Step 2:

Cut a generous amount of embroidery floss. I cut 4 pieces (2 feet long each).

Step 3:

Position your embroidery hoop over the words. Begin embroidering with your preferred stitch. I used a simple back stitch. Click here to see my back stitch tutorial.

Step 4:

When you reach the end, knot and cut thread. You are finished!

Thursday, January 1, 2009

Felt Barrette Tutorial


Inspired by Angry Chicken. I tried my best to sew them on my machine, but I could NOT sew on the lines very straight. So, I improvised and hand stitched some barrettes instead.
.....................................................................................

Supplies

A- Felt (I love wool felt, but the craft felt works well to)!
B- Fabric pen
C- Embroidery or Craft Thread
D- Scissors
E- Needle
F- Snap Barrettes (I found them for a good price at a beauty supply store)

Step 1

Trace barrette twice onto your felt using your fabric pen.
Step 2

On one of your traced felt barrettes, mark in-between the back snap as shown in picture (in red).
Step 3

Cut out your barrettes about 1/8" from the trace lines.
Step 4

Cut a slit from red dot to red dot.
Step 5

Thread your needle and knot your thread on one end.
Step 6

Sandwich the two felt barrette pieces together and bring thread up through the skinny end of the top felt piece (this will hide your knot).
Step 7

Blanket-stitch up to the wide end of the felt sandwich and stop stitching.
Step 8


Slide the metal barrette into the sandwich sliding the skinny snap through the slit in the back felt piece. See the pictures. Now snap the metal barrette shut.
Step 9

Continue to blanket-stitch back to the starting point, enclosing the metal barrette as you go. Turn barrette over (as shown in picture), knot and cut your thread.
Finished Barrette:


Don't forget to visit the rest of my blog! I also have a forest fawn stuffie pattern for sale here. My instructions are accompanied by full color photographs and I give permission for you to sale your fawn creations!

Saturday, November 29, 2008


My homemade donuts were a hit this morning~
Most Saturday mornings, my children start nagging to go to the donut shop. I, however, just want a relaxing Saturday morning at home, sipping coffee, and planning out the weekend.
Recently I was reminded of my mother making homemade donuts for my siblings and me on cold Chicago mornings. The Deerfield Bakery was restricted to extra special occasions only. So, in honor of a sweet childhood memory, I attempted to make some.
They were so simple.
.................................................................................
You need:
2 cans of biscuits
2 C. confectioners sugar
3 Tbs. water
1/2 tsp. vanilla extract (optional)
vegetable oil for frying

Heat skillet on medium and pour in oil. I poured in about 1/3" deep. You just kind of have to eyeball it...

Now open the biscuits and layout on wax paper. Cut out centers with a small round cookie cutter - or anything else you can find. I used the screw on cap to a Ginger Ale bottle. Keep the middles to make donut holes!

In a small bowl mix confection sugar, water, and vanilla. Set aside.

When oil is hot (I stick the end of a wooden spoon in the pan and if bubbles appear around the spoon, its ready) carefully drop in 2 - 3 donuts at a time.
Stand right by the donuts as they cook really fast, when one side is golden brown, flip to the other side. Tongs are really useful for this.
Take out cooked donuts and place on a paper towel.

Finally, drizzle the donuts with your glaze and sprinkle with some extra confectioners sugar.

These homemade donuts remind me of funnel cakes that you get at the fair. They are crunchy, warm, sweet, and soft all at the same time.

Tuesday, November 25, 2008


These prints are made on professional Kodak matte photo paper and are made to last 100+ years under normal living conditions.

They are now available in my shop and shipping is FREE on this item!

Monday, November 24, 2008

Homemade Play Dough


I enjoy making this homemade play dough. I think my favorite part is creating the colors! The texture is wonderful. You can make several batches in different colors and package them up in cute containers to have quick gifts for playmates.

This is also a great opportunity to introduce measuring and the color wheel to your kids - they can help add the food coloring to discover how colors mix!

Homemade Play Dough Recipe
makes about 2.5 Cups

1 1/2 cups of flour
3/4 cups of salt
1 1/2 cups water
1 TB vegetable oil
1/2 TB cream of tarter
food coloring - I use the liquid kind

Mix all of the ingredients into a saucepan. Add the food coloring to your liking. - Kids can help with this step

Adults only -
Set your stove top to medium-low (about a 2.5 on a glass top stove). Stand by the pan and stir occasionally. When the batter look is gone and the ingredients start staying together when you stir (5-8 minutes), remove the pan from the heat. Lay out some wax paper and scoop play dough onto the wax paper. I can usually start kneading right away, but make sure that you check the dough for heat - you don't want to burn yourself!
Once the dough has been kneaded into a nice texture, place in an airtight container or zip lock. The snack sized zip locks work beautifully.

Wednesday, November 5, 2008


This is my newest piece of costume jewelry that I put together. I enjoy wearing it with my green tunic.